
Lancing Device vs Scalpel: Which Option Is Safer and More Practical for Wet Cupping Beginners?
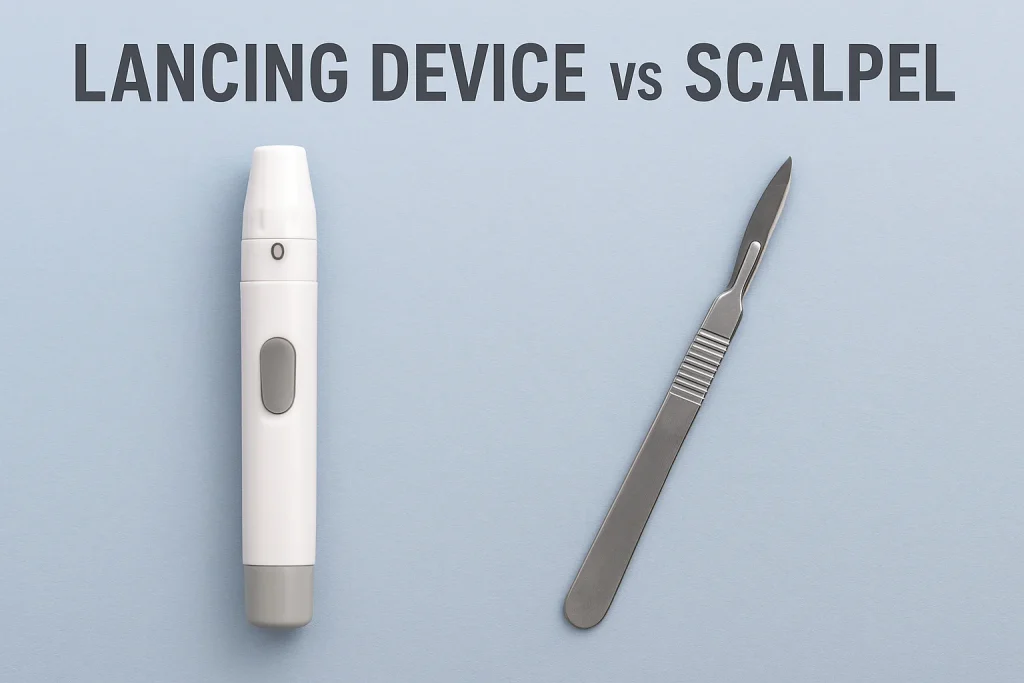
For many beginners learning wet cupping, one question appears again and again:“Should I use a lancing device or a scalpel?” At first glance, both tools seem capable of creating the small micro-openings needed for a safe wet cupping session. However, their risk level, precision, and practicality are very different. Most experienced practitioners agree that beginners should take the safest possible route. In fact, many wet cupping practitioners with 10–20 years of experience still avoid using a scalpel entirely, not because they cannot use it—but because there is rarely a situation that justifies the extra risk. Below is a clear, practical, and well-researched comparison to help you understand which tool supports safety, consistency, and gentle technique—especially for those just starting out. Why Beginners Need to Prioritize Safety Above All Wet cupping itself is already a technical practice that requires calm hands, body awareness, and sterile preparation. Introducing unnecessary sharp instruments increases the risk of: deeper cuts difficulty controlling incision depth uneven openings excessive bleeding contamination risk longer healing time This is why tool choice matters so much. The goal is not to make wide or dramatic incisions—it’s simply to create tiny, consistent micro-openings that allow stagnant fluids to be released without harming the surrounding tissue. Most beginners do not realize that the best wet cupping sessions operate on precision, not force. This is where the difference between lancing devices and scalpels becomes extremely important. Lancing Device Vs Scalpel for Wet Cupping Why a Lancing Device Is Considered the Safest Option Wet cupping itself is already a technical practice that requires calm hands, body awareness, and sterile preparation. Introducing unnecessary sharp instruments increases the risk of: deeper cuts difficulty controlling incision depth uneven openings excessive bleeding contamination risk longer healing time This is why tool choice matters so much. The goal is not to make wide or dramatic incisions—it’s simply to create tiny, consistent micro-openings that allow stagnant fluids to be released without harming the surrounding tissue. Most beginners do not realize that the best wet cupping sessions operate on precision, not force. This is where the difference between lancing devices and scalpels becomes extremely important. Why a Lancing Device Is Considered the Safest Option A lancing device is originally designed for controlled micro-punctures—usually for diabetic blood tests. This makes it inherently suitable for wet cupping beginners. Controlled Depth A lancing device is built with a mechanical stop, meaning the needle only penetrates a very shallow and fixed depth. This control protects beginners from unintentionally making cuts that are too deep, too long, or angled. Consistent Openings Each click produces uniform micro-openings. For beginners, consistency is far more important than “strength.” Lower Bleeding Risk Because the punctures are tiny and shallow, the technique produces enough blood flow for wet cupping without triggering excessive bleeding. Extremely Low Learning Curve Most people can learn to use a lancing device in minutes. There’s no angle adjustment, no blade control, and minimal hand pressure required. Widely Trusted in Modern Wet Cupping A large portion of global practitioners—especially in clinics following stricter safety standards—use lancing devices for nearly all body areas except a few special cases. And here’s an important reality that many beginners don’t know: Even practitioners with 20 years of experience often stick with a lancing device. Why? Because: it reduces risk it keeps procedures predictable it minimizes tissue trauma it allows cleaner aftercare clients feel more comfortable For most wet cupping protocols—especially migraine, insomnia, upper-back tension, mastoid points, cervical release, and stress-related sessions—a lancing device is more than enough. Why a Scalpel Is Generally Not Recommended for Beginners A scalpel is a surgical blade designed for incisions, not micro-punctures. Even when used lightly, the blade can cut deeper or wider than intended. High Risk of Accidental Deep Cuts Beginners often misjudge pressure or angle. Even a 1–2 mm mistake can cause unnecessary pain or prolonged healing. Difficult to Control A scalpel blade demands: angle precision steady wrist control correct pressure distribution constant monitoring This takes significant training and is not ideal for home practice or early stage learners. Not Suitable for Sensitive Areas Certain areas should never be touched with a scalpel, even by experienced practitioners: face around the eyes mastoid region (behind ears) cervical points thin-skinned individuals These areas require gentle micro-openings—not slicing motions. Higher Bleeding Risk A scalpel incision typically creates: more bleeding volume less controlled flow wider exposure to contaminants slightly longer healing time This increases the burden of aftercare. The Professional Consensus Even highly experienced practitioners rarely use a scalpel unless absolutely necessary (such as hardened skin or scar tissue). In real-world practice, over 90% of routine wet cupping sessions can be performed perfectly with a lancing device alone. How Wet Cupping Benefits From Consistent Micro-Openings Regardless of the tool, the purpose of the micro-openings is to: allow stagnation to exit reduce superficial congestion improve circulation in targeted areas support the body’s natural recovery signals A lancing device achieves all these outcomes while minimizing tissue trauma. Scalpel incisions do not increase benefits—only risks. Practical Guidelines to Reduce Risk and Improve Results If you’re a beginner, follow these foundational habits: Use a fresh sterile lancet each time Never reuse. This keeps infection risk extremely low. Clean the skin thoroughly Use alcohol swabs or antiseptic solution. Keep the openings small More openings are safer than deep openings. Avoid high-risk regions Especially thin skin, the face, front neck, or areas with visible veins. Start with “safe zones” Such as: upper back trapezius shoulder belt thoracic region 6. Learn proper cup timing
Areas You Should Never Cup
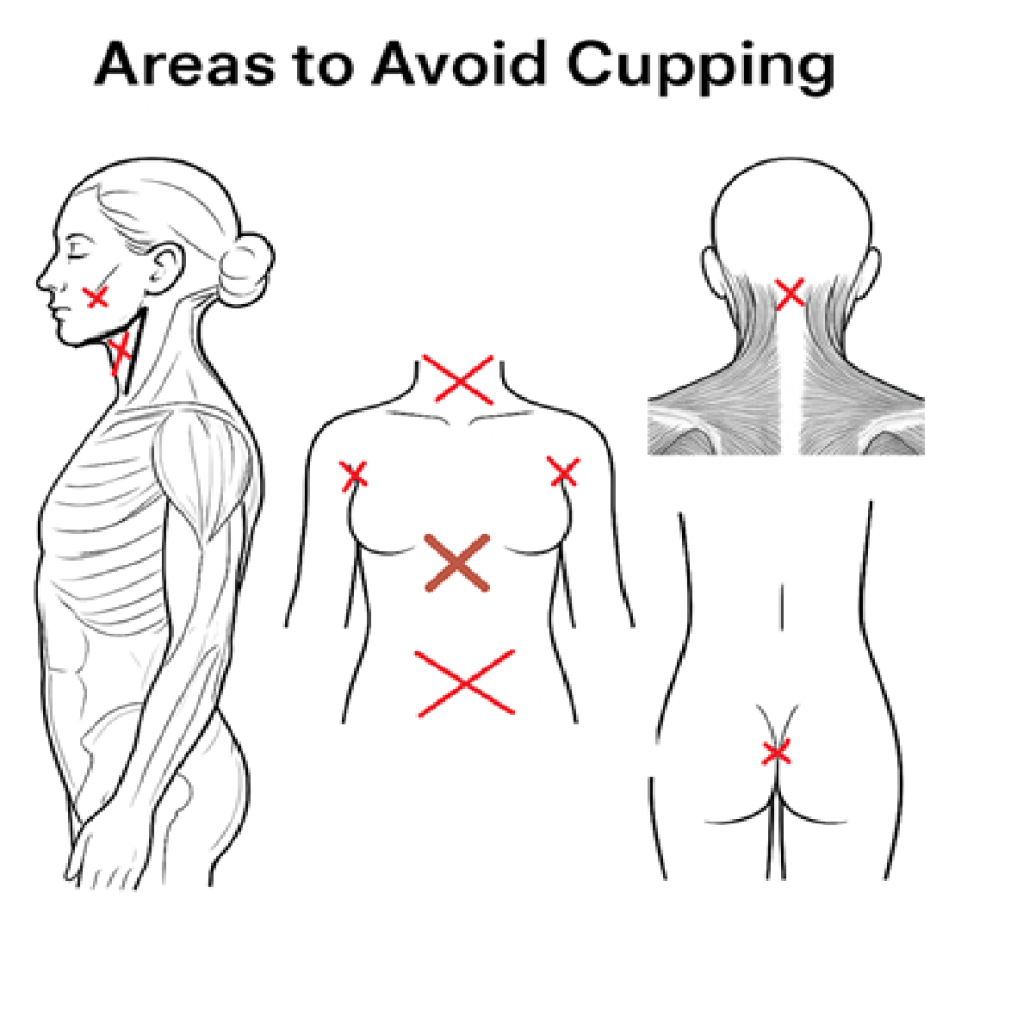
Wet cupping is generally safe when done correctly and on the right anatomical regions. But several parts of the body should never be cupped—especially by beginners or anyone without formal training. These areas contain major arteries, glands, nerves, and delicate tissues that are extremely sensitive to pressure, suction, or small incisions. Knowing these “forbidden cupping zones” is essential for preventing complications and keeping the practice safe, effective, and respectful to the body’s natural structure. Forbidden Cupping Zone Avoid cupping these areas The following zones you should never cup: Front of the neck (throat area). This region contains the carotid arteries, jugular veins, and vital nerves that regulate blood pressure and breathing. Any suction here can interfere with circulation or cause dangerous pressure changes. Chest directly over the heart. The heart lies just beneath the sternum and left chest wall. Applying cups here may disturb normal cardiac rhythm or cause discomfort from excessive pressure. Abdomen below the ribs (stomach region). The digestive organs and soft tissues here are highly sensitive. Improper cupping can lead to internal bruising or affect peristaltic movement. Lower spine near the tailbone. The sacral and coccygeal nerves are densely packed in this region. Cupping too close may trigger nerve irritation or lower-back strain. Breast or private areas. These zones contain hormonal glands and delicate tissues that are not meant to be suctioned. Cupping here is strictly contraindicated in both traditional and modern practice. Inner folds of elbows and knees. The skin here is thin and rich in blood vessels; suction can easily cause bruising or nerve compression. Wet Cupping Do’s and Don’ts ✔ Do Apply cups only on safe, muscular, well-vascularized regions Start with moderate suction Use sterile equipment and proper hygiene Follow anatomical landmarks carefully ✘ Don’t Apply suction over major organs Cup over thin skin, nerve-rich folds, or hormonal glands Use strong suction as a measure of “effectiveness” Perform wet cupping without basic anatomical knowledge Principle to Remember In essence, wet cupping should only be applied to safe, muscular, and well-vascularized areas, never on bony prominences or over vital organs. Always begin with moderate suction, use sterile tools, and maintain proper hygiene standards. Remember: true healing in wet cupping does not come from how strong the suction is, but from how wisely and safely it is performed. Safety, cleanliness, and understanding turn wet cupping from a mere physical technique into a refined healing art — one that honors both the body’s intelligence and nature’s balance.
Lancing Device: Modern Precision for Safe Wet Cupping Practice
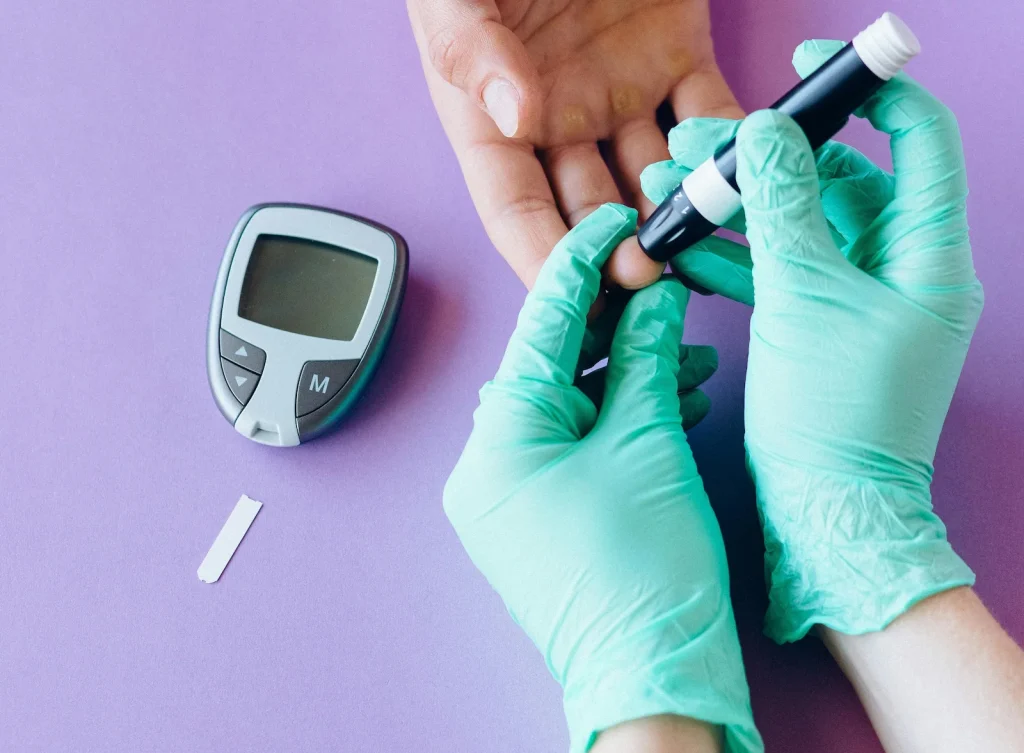
Wet cupping has evolved through centuries — from sharp blades and skilled hands to modern, precise tools. One of the most significant innovations that bridges ancient wisdom and modern practicality is the lancing device.Originally developed for diabetic patients to draw a small drop of blood for glucose testing, this simple tool has become a transformative instrument for safe, clean, and accessible wet cupping at home. From Diagnostic Tool to Holistic Practice The lancing device was not designed for cupping; it was designed for accuracy. In diabetes care, it allowed patients to obtain a tiny drop of blood with minimal pain. Over time, practitioners realized that the same precision could be applied to wet cupping, offering a way to create micro-incisions without the risks associated with traditional blades. A modern lancing device works like a pen. It holds a sterile, single-use lancet inside. When pressed, a spring mechanism quickly punctures the skin at a controlled depth — just enough to let a drop of blood appear.This precision eliminates the need for experience with a scalpel, allowing nearly anyone to perform the procedure safely and confidently. Why It Revolutionized Wet Cupping Traditional wet cupping often required years of practice to master incision control. Too deep, and it could hurt; too shallow, and the result was ineffective. The lancing device solved both problems by standardizing depth and safety. Today, what was once an art reserved for specialists has become a home-based wellness skill accessible to families around the world. A simple tool costing only a few dollars now opens the door to self-care that is both effective and affordable. This democratization of wet cupping doesn’t just make it easier — it makes it safer.Each sterile lancet ensures no cross-contamination, and adjustable depth settings let users match the device to their skin sensitivity and comfort level. The Perfect Balance: Recommended Lancet Size From more than 20 years of field experience, the 21G (Gauge) lancet stands out as the best choice for wet cupping. It offers the right balance between gentle penetration and efficient blood release — ideal for both beginners and experienced practitioners.Finer sizes may not release enough stagnant blood, while larger ones can cause unnecessary discomfort. The 21G strikes the harmony between comfort, control, and therapeutic effect. Safety Guidelines and Hygiene Safety remains the foundation of professional wet cupping. While lancing devices simplify the process, discipline and cleanliness determine the outcome. Here are essential safety reminders: Always wash your hands and wear disposable gloves. Use a new sterile lancet for each session. Clean the skin area before and after cupping with antiseptic wipes. Avoid performing wet cupping if you have clotting disorders, skin infections, or open wounds. Dispose of all used materials properly after each session. Remember: tools make the process easier, but hygiene and mindfulness make it truly healing. Accessibility and Affordability The beauty of the lancing device lies in its accessibility. Most pharmacies and online platforms — from Amazon and Walmart to local apothecaries — sell them without prescription. Basic plastic models cost around $2–$5 USD, while sturdier stainless-steel versions range between $10–$15 USD. A box of 100 sterile lancets, costing only $3–$6 USD, can serve 100 people safely — proof that true wellness doesn’t have to be expensive. A Modern Bridge Between Tradition and Science The evolution of the lancing device reflects a deeper truth about wet cupping: real healing adapts with time. By combining ancient understanding of blood stagnation with the precision of modern tools, we create a practice that’s safer, cleaner, and more inclusive. What used to require years of training can now be performed responsibly at home — restoring wet cupping’s original essence: empowering people to take charge of their health naturally. A small device, once meant for medical testing, has become a bridge between the old and the new — between knowledge and practice, safety and healing.
Blistering After Wet Cupping: Understanding and Managing Skin Reactions
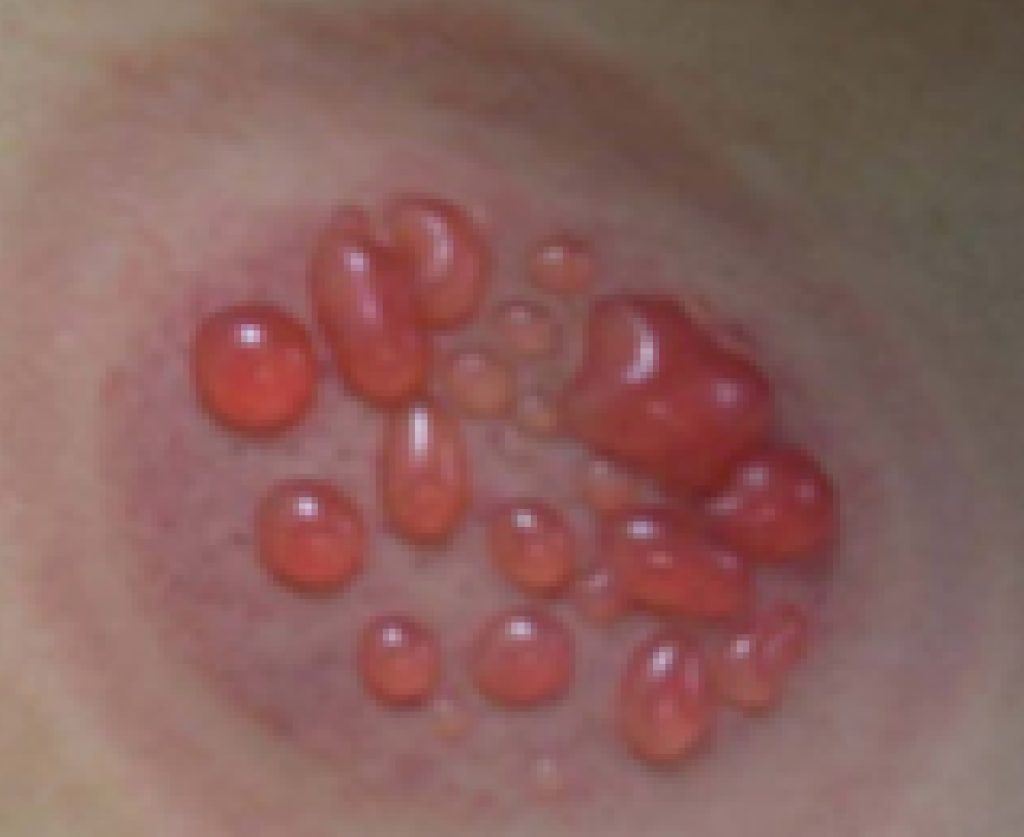
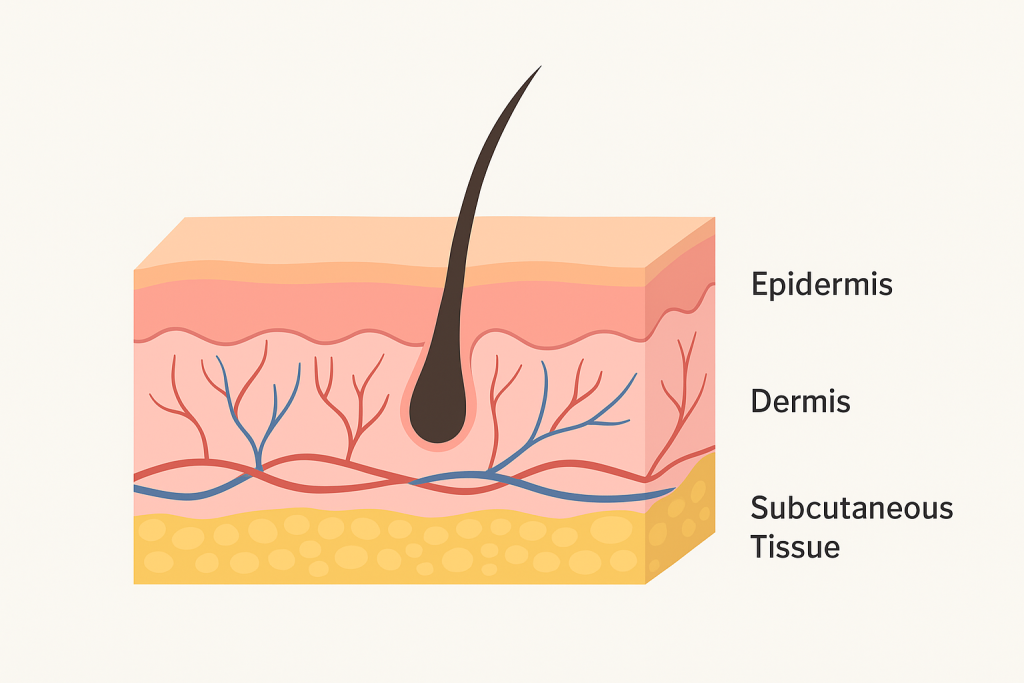
Wet cupping is designed to stimulate circulation and detoxification through gentle suction. However, in some cases, a small blister or clear fluid bubble may appear on the skin afterward. This mild reaction, known as blistering, is not dangerous when treated properly. It simply reflects the body’s local healing response — especially when the suction pressure is slightly too strong or the cup is left in place longer than recommended (Ahmed et al., 2011). Why Blistering Happens During wet cupping, suction draws stagnant blood and interstitial fluid toward the surface. If the skin’s upper layer (epidermis) is particularly sensitive or dry, the tension between the layers may form a tiny pocket of fluid — the body’s way of protecting the area. This blister functions as a natural cushion, preventing deeper irritation and promoting healing underneath. In short, it’s a signal of active circulation, not necessarily an injury. Blisters are more likely to appear when: Cups are left for more than 10 minutes on delicate skin areas. The skin has been previously exfoliated or exposed to sun. Pressure levels are not adjusted to the individual’s condition or skin type. Skin blistering in cupping area What You Should Do Stay Calm and Observe Most blisters are minor and self-healing within a few days. The key is patience and proper care. Keep the Area Clean Gently wash the area using warm water and mild antiseptic once or twice a day. Avoid alcohol-based solutions, which may dry the skin further. Do Not Pop the Blister Unless you are trained and using sterile tools, never pierce the blister. Let it dry naturally — this prevents bacteria from entering and reduces the risk of infection. Support Skin Recovery After cleansing, apply a thin layer of natural oil to nourish the skin barrier.Recommended options include: Black seed oil – for its mild antimicrobial and anti-inflammatory effects. Argan oil – rich in vitamin E, helping skin elasticity. Olive oil – supports cleanliness and reduces redness. Protect the Area Avoid scratching, direct sunlight, or tight clothing that may irritate the blistered skin. Allow fresh air when possible, and continue gentle care until fully healed. Blistering After Wet Cupping: Does It Cause Harm? A small blister doesn’t mean harm — it often represents the body’s micro-adjustment to improved circulation. Each person’s skin responds differently to detoxification and suction. As long as you maintain cleanliness and calm observation, the area will recover naturally, leaving the skin refreshed and strengthened.
Is Wet Cupping Safe for Blood Vessels? Here’s the Real Answer
Wondering if wet cupping (Hijama) can damage blood vessels? Learn the science behind why it’s safe, gentle, and even strengthens microcirculation.